


There's nothing quite like watching your own home being built from the ground up. The moment the walls go up is truly magical—it's when a floor plan on paper finally starts to feel like a real home. This transformative stage is all about the house framing. This is where skilled crews assemble the wooden skeleton that forms your home’s essential structure. But not all framing is created equal. The methods and materials used can impact everything from your budget to your building schedule. Let's get you up to speed on this crucial phase of construction.
Other people want to build their houses from the ground up. To them, there’s no point living in a place that someone else has owned. They’d rather build a space that exactly meets their needs.
If you’re leaning towards building your own home, you’ll need to know how to frame a house. The basics of house framing aren’t hard to understand, but they’re essential if you want to build a sturdy dream home that will last for years to come.
Table of content
What is house framing?
The frame is essentially the house’s skeleton — it holds up all the wall coverings and outer plaster and creates the general structure of your home. House framing relies on a sturdy foundation and proper site prep before framing can begin.
The most common material used for framing houses is wood. The reason for this is because wood is often more affordable than other materials like steel, concrete, and brick. Plus, it’s easy to find. You can frame a house in materials besides wood, but your framing costs may go up depending on what you choose.
Key Components of House Framing
Once your foundation is poured and cured, the real visual progress begins with framing. This is the stage where the skeleton of your house takes shape, and you can finally walk through the rooms you’ve been picturing. Understanding the key components of framing is helpful whether you’re a hands-on DIYer or you’re working with a general contractor. Knowing the terminology and the purpose of each piece will help you follow the build, ask intelligent questions, and appreciate the structural integrity of your future home. The entire framework can be broken down into a few main systems: the walls, the floors, and the roof, all working together to create a stable structure.
What final checks should be performed before beginning wall framing?
Before you dive into raising walls, a few critical checks will save you headaches later. Start by ensuring that your floor system is rock-solid. Grab that reliable level (yes, the one you’ve used a hundred times) and confirm all joists and subfloor panels are perfectly flat and even—no unexpected dips or peaks that could throw off your measurements later.
Next, double-check that everything is both level and plumb. This step is vital for walls that are true and doors that don’t swing open on their own. Make sure all connections—joist hangers, anchor bolts, and fasteners—are snug and properly installed. A quick run-through with your framing hammer and a sharp eye can catch anything loose or out of alignment.
Taking a few minutes for these inspections now means less worry about creaks, movement, or surprises down the road when your house is fully buttoned up. Once you’re satisfied that the foundation, joists, and subfloor are strong and square, you’re ready to move on to the next stage: putting up those walls.
The Main Steps in Framing a House
So, what actually goes into framing a house? Whether you’re swinging the hammer yourself or just want to keep an eye on the process, knowing the main steps will give you a clearer picture of how your future home comes together.
- Laying the Groundwork: First up, the foundation. Before any wood gets cut, the site is prepared and a solid foundation is poured. Everything rests on this—literally.
- Building the Floors: Next, floor joists and subflooring are installed to create the flat surfaces your rooms will call home. This step sets the stage (literally) for everything above it.
- Raising the Walls: With floors in place, it’s time for the walls to go up. Studs, plates, and headers form the vertical frame, with spaces left for doors and windows. This is usually when a floor plan starts looking like an actual house rather than just a platform in a field.
- Framing the Roof: The final piece of the structural puzzle is the roof. Rafters or prefabricated trusses are set, connecting the walls and giving the home shelter. Plywood sheathing is then added to tie everything together.
- Openings and Utilities: Once the bones are up, windows and doors are fitted into their openings. Meanwhile, crews will start running plumbing and electrical lines through the walls before the whole thing gets closed up.
- Insulation and Barriers: Before you can add drywall or siding, insulation is added to the walls and floors. A vapor barrier is also installed to keep your new home cozy and dry.
With these steps, you’ll see your home’s skeleton go from a pile of lumber to a recognizable, walkable structure.
Heavy-Frame vs. Light-Frame Construction
Most modern homes use one of two primary framing methods: heavy-frame or light-frame construction. Heavy-frame construction is the older, more traditional method, often seen in historic barns and post-and-beam homes. It uses large, heavy timbers or steel beams with complex joinery, requiring fewer but much larger supports. While beautiful, it's often more expensive and labor-intensive. In contrast, light-frame construction is the standard for most residential building today. It relies on many smaller, standardized pieces of lumber, like 2x4s and 2x6s, to create a strong yet lightweight structure. This approach is popular because it’s incredibly versatile, cost-effective, and the materials are easy to source from any lumberyard, making it the go-to choice for builders across the country.
The Anatomy of a Wall Frame
Wall frames might look like a complicated grid of lumber, but they’re built from a few key repeating parts. The vertical "bones" of the wall are called studs, and they are held in place by horizontal boards at the top and bottom, known as plates. For any openings like doors and windows, a sturdy beam called a header is installed across the top. This header is crucial because it carries the load from above and transfers it to the studs on either side of the opening, preventing the structure from sagging. This system of studs, plates, and headers creates the basic shape and strength of every wall in the house, forming the grid that will eventually hold insulation, drywall, and wiring.
After the basic wall frame is built, it gets a "skin" called sheathing. This usually consists of large panels of plywood or oriented strand board (OSB) that are nailed to the exterior side of the studs. Sheathing is a game-changer for the structure’s stability. It connects all the individual framing members into a single, rigid unit that can stand up to lateral forces like wind. Without sheathing, the walls would be wobbly and weak. It also serves as the solid backing for your home's exterior finish, whether you're planning on installing siding, brick veneer, or stucco. It’s the component that truly ties the wall frame together and prepares it for the next stages of construction.
Insulation and Vapor Barrier: Securing and Sealing
Once the framing and sheathing are up, it's time to consider how to keep the elements where they belong—out there. The duo of insulation and a vapor barrier is your home’s defense against drafts, moisture, and energy loss. But simply tossing insulation between the studs won’t cut it. Properly securing and sealing both materials is key for comfort and longevity.
For insulation, friction is usually your friend—most batt insulation is cut to fit snugly between the studs, holding itself in place. In trickier spots or above your head, you can use staples, wire supports, or even special insulation hangers to keep it from sagging or sliding over time.
When installing a vapor barrier (typically a sheet of polyethylene plastic), make sure it’s placed on the warm side of the insulation—that’s inside for cold climates. Unroll it over the face of the studs, overlapping seams by several inches so there are no weak points for water vapor to sneak through. Secure it with staples along the framing and smooth out any wrinkles.
The final touch? Thoughtful sealing. Carefully tape all seams with an appropriate construction tape (like 3M or Tuck Tape), and use caulk or expanding foam to fill any little gaps around windows, doors, and places where pipes or wires pass through. This step is crucial, as even a tiny gap can let in unwanted air and moisture—a recipe for mold and higher energy bills.
By taking these steps, you transform the bare bones of your wall into a tight, energy-efficient envelope, ready for whatever weather comes your way.
How Wall Frames Are Secured
Once your wall frames are assembled, connecting them to the rest of the structure is where the real magic (and muscle) happens. There are a couple of key steps to ensure everything is locked in tight:
-
Securing to the Floor: The bottom plate of each wall frame is anchored directly to the floor system, usually with large nails or structural screws. In new builds, the bottom plate often gets fastened to the subfloor or sill plate using a powder-actuated nailer or heavy-duty anchor bolts—tools you'll find on any contractor’s wish list. This step locks the wall in place and prevents shifting over time.
-
Joining Walls Together: At the corners and where interior walls meet exterior walls, the top plates are tied together so the framework acts as a unified structure. You'll see this done by overlapping the top plates of intersecting walls and securing them with nails or screws, creating continuous paths for load transfer and reinforcing the entire frame. Think of it like snapping Lego pieces together for grown-ups—but with hardware and a hammer at the ready.
Careful attention at this stage ensures the skeleton of your house is strong, square, and ready to take on the next steps.
Raising and Securing Wall Frames
Once your wall frames are fully assembled and sheathed, the next big milestone is actually getting them upright and locked into place. This is when your project really starts to look like a house—rooms become real, and everything suddenly feels much more tangible.
Step-by-Step Process
- Lifting the Walls: With a partner (or three), lift each wall frame onto the subfloor, lining them up with the chalk lines or layout marks you made earlier. Go slow here—wall frames can be heavier than they look, especially with sheathing attached.
- Bracing for Stability: As soon as the wall is standing, use temporary angled boards—called braces—to hold it plumb (perfectly vertical) and steady. This keeps everything in position while you work and prevents unwanted wobbles if the wind picks up.
- Fastening Down: Secure the bottom plate of the wall to the subfloor or floor framing using heavy-duty nails or construction screws. Check your local building codes—some areas require specific anchor bolts, especially in regions prone to high winds or earthquakes.
- Tying Walls Together: Once the first wall is anchored, repeat the process with the adjoining wall. Where two walls meet, connect their top plates and corners so the structure acts as one unit. This gives your house the strength it needs to withstand whatever nature throws its way. Double-check for plumb and adjust as needed before final fastening.
By taking the time to brace, align, and thoroughly fasten each wall, you'll ensure that your new home's skeleton is rock solid—and ready for the next phases of framing.
Floor and Roof Framing Basics
Just as walls have their system, so do floors and roofs. Floor framing starts with joists, which are horizontal beams that stretch across the foundation to create the main support for a floor. These joists are then covered with a subfloor, usually large sheets of plywood or OSB, creating the solid surface you walk on. Roof framing is often the most complex part of the project, involving intricate angles and cuts to create the structure that will protect your home from the elements. This can be done with individually cut rafters or with pre-fabricated trusses delivered to the site. Both systems are designed to support the weight of the roofing material and handle loads from snow and wind. Proper planning is absolutely critical for all these stages, starting with a solid foundation plan based on your site plan for the permit, which dictates the home's exact placement and dimensions on your property.
Common Roof Designs and Their Features
Once your walls and floors are set, it's time to turn your attention upward—to the roof. Roof design isn't just about aesthetics; the choice you make has a big impact on how your house handles wind, rain, snow, and even attic space. Let’s break down the most popular roof styles you’ll encounter in home construction:
-
Gable Roof: This is the classic "house" shape most folks draw as kids—a simple triangle made of two slopes meeting at a top ridge. Gable roofs are common in North America thanks to their straightforward construction and great ability to shed water and snow.
-
Hip Roof: Instead of two slopes, hip roofs have four, with every side sloping down toward the walls. This design makes them extremely stable and better equipped to withstand high winds—why you’ll spot them from the blustery Midwest to hurricane-prone coastlines.
-
Gambrel Roof: If you’ve ever admired a classic red barn, you’ve seen a gambrel. Each side has two slopes—the lower portion is much steeper, maximizing usable space beneath the roof. This style allows for spacious attics or even full second floors, and brings instant country charm to any home.
-
Mansard Roof: Straight from the streets of Paris, the mansard includes two slopes on each of its four sides, with the lower slope being much steeper than the upper. This distinctive silhouette is more than just a style statement; it also carves out generous living or storage space within the roof itself, perfect for bonus rooms or dramatic lofts.
No matter the roof type, each design brings its own mix of weather defense, structural needs, and curb appeal. Picking the right style depends a lot on your climate, space needs, and the architectural flavor you want your home to serve.
Essential Steps for Planning and Installing Electrical Systems During Framing
While the bones of your house are coming together, it’s the electrical planning that determines whether your future self will be happily plugging in a toaster or desperately hunting for an outlet behind the couch. Getting your electrical system right from the framing phase saves headaches (and hair-pulling) down the line.
1. Start With a Solid Electrical Plan
Before any wires go up, you’ll want a detailed blueprint that maps out where every outlet, switch, fixture, and panel will live. This plan isn’t just for your peace of mind—it ensures you’re meeting local building codes and safety standards. Remember to think through furniture placement, kitchen appliances, and even Christmas lights while plotting these locations.
2. Select the Right Materials
Next up: gathering the right gear. Standard NM (“Romex”) cable works for most residential framing, but be sure to use conduit in areas that need extra protection (like unfinished basements or garages). Durable electrical boxes and correctly rated breakers and outlets keep everything up to code and running smoothly.
3. Rough-In Electrical Boxes and Wiring
With plans approved, it’s time to install electrical boxes for outlets, switches, and lights. Mount these boxes snugly between studs so they’ll line up perfectly once drywall goes up. Then, run wiring through pre-drilled holes in studs and plates, leaving plenty of slack for future adjustments. Where piping and wires must cross paths, coordinate with your plumber to keep everything accessible and tangle-free.
4. Prepare for the Main Panel
Every branch circuit needs a safe route back to the main electrical panel, which gets mounted in an accessible (but out-of-the-way) location. Make sure you assign each circuit to an appropriate breaker—overloading is a rookie mistake you don’t want to make.
5. Prioritize Safety and Inspections
As with the rest of your framing, safety is king. Add nail plates wherever wires pass through studs, and double-check there’s no risk of screws or drywall nails damaging your work. Before wrapping up, schedule inspections so your local electrical inspector can sign off on everything—this step isn’t optional!
6. Document and Test
Before the insulation and drywall go in, map out where every wire and box runs for your records (future-you will thank you during home projects or repairs). Complete a round of electrical testing to confirm all circuits function as intended, and troubleshoot any small gremlins now—it's far easier while everything is exposed.
With these essentials covered, your electrical system will be safe, functional, and ready for whatever gadgets and light fixtures the future holds.
Adding Roof Sheathing and Making Necessary Cutouts
Once the roof framing is complete, it’s time to give it a solid surface—this is where roof sheathing comes in. Most builders use large panels of plywood or oriented strand board (OSB) for this job, since both are sturdy and widely available at your local building supply.
The process starts at the lower edge of the roof. You’ll lay the first row of sheathing panels horizontally, making sure each panel is snug against the next and flush with the edges. Fasten the panels securely to the rafters using nails or screws spaced along each framing member. As you move upward, stagger the joints of each row—think bricklaying—to boost strength and prevent weak points.
Pay close attention around areas like chimneys, skylights, or vents. Use a circular saw or jigsaw to carefully cut precise openings in the sheathing panels so these features can fit through. It’s critical to measure twice before cutting, as tight, accurate fits help with weatherproofing later.
With the sheathing in place and all required cutouts made, your roof now has a unified, rigid surface that’s ready for underlayment and shingles. This step ties the whole structure together and sets the stage for the next phase of your home’s outer shell.
Wrapping Up Before Drywall
Once the insulation and vapor barrier are in place, there are a few essential steps left to get your walls ready for drywall. First, go around and carefully seal up any gaps around windows, doors, or spots where pipes and wires pass through the barrier. This can be done with caulk or low-expansion spray foam—think of it as an extra insurance policy against drafts and moisture sneaking in.
Next, take a close look at your work: inspect all areas to make sure the insulation is tucked in correctly and the vapor barrier overlaps smoothly with no rips or exposed seams. If you spot any issues, now’s the time to fix them—much easier than after the drywall goes up!
Once you’re sure everything is airtight and properly covered, you’re ready for the drywall crew to step in and start bringing the interior walls to life. This attention to detail ensures your home will stay comfortable, energy efficient, and protected from hidden moisture headaches down the road.
How to Lay Out and Fasten Subfloor Panels
When it’s time to install subfloor panels, a little care in orientation and fastening goes a long way toward a solid, squeak-free floor. Always position subfloor panels so their long edges run perpendicular to the floor joists. This helps distribute weight evenly and gives maximum strength to the finished floor system. As you go, stagger the joints of the panels across rows—think of laying bricks so the seams don’t all line up. This adds structural integrity and prevents weak spots from forming.
To avoid future creaks, it’s smart to lay down a bead of construction adhesive on the top edge of each joist just before setting each panel. Once the panel is in place, fasten it securely using nails or, even better, deck screws for a tighter hold. Make sure each panel sits flat and even with its neighbors—the fewer lips and bumps, the less likely you’ll notice the floor later. Take your time with this step, and your floors will thank you for years to come.
What Happens When House Framing Gets Rained On?
A little rain during construction might seem like a disaster, but in most cases, short-term exposure isn’t the end of the world—especially if the lumber is pressure-treated or kiln-dried. Brief rainfall usually doesn’t do much harm, and wood will often dry out on its own once the sun comes back out.
However, leaving framing exposed to the elements for longer stretches is a different story. Water can soak into untreated wood, causing it to swell, warp, or twist out of alignment. If moisture lingers, it creates the perfect breeding ground for mold or mildew, both of which can be problematic down the road.
To keep things on track:
- If the forecast calls for ongoing downpours, it’s smart to cover your framing with tarps or temporary sheathing.
- Always let damp wood dry thoroughly and keep airflow steady before sealing up the walls—this helps avoid trapping moisture where you can’t see it.
Properly managing moisture early on means your walls, floors, and roof will stay healthy for the long haul, with less risk of hidden surprises later in the build.
Ensuring Wall Frames Are Ready for the Roof
Before you move on to setting the roof framing in place, a couple of critical checkpoints will save you headaches down the line:
- Check for plumb and square: Grab your trusty level and framing square to make sure every wall stands perfectly vertical (plumb) and all corners sit at true right angles (square). Small errors here can compound as you build upward, so dial everything in before adding more weight or structure.
- Install permanent bracing: Temporary bracing probably kept things steady during framing, but now’s the time to secure the walls with permanent diagonal bracing or specialized metal connectors—especially if your region faces high winds or is in an earthquake-prone zone. This step locks the walls together and prepares the structure to handle whatever Mother Nature throws at it.
Once these final checks are complete, you'll have a rock-solid platform ready for the complexities of roof framing.
Plumbing and the Framing Puzzle
Integrating plumbing into a home’s framing is a bit like working on a puzzle where every piece needs to slot together—without cracking the picture. Proper planning pays off here, ensuring everything flows harmoniously (pun fully intended).
Plan, Plan, and Then (Yes) Plan Again
The first step is mapping out every pipe, connection, and fixture on your blueprints before a single saw hits wood. Think of it as a live architectural game of Tetris. Plumbing needs—like where water lines, drains, and vent stacks will run—should be coordinated with the wall, floor, and roof framing. This keeps last-minute “oops, there’s a stud in the way” moments to a minimum.
Check your plans against local plumbing codes, which call the shots on everything from pipe materials to minimum slopes in drain lines. Speaking of materials, choose wisely: copper and PEX are common for supply lines, while PVC or ABS usually handle waste and venting.
Pathways Through the Frame
When it’s time to rough in the plumbing, the big challenge is weaving pipes through the tightly knit network of studs, plates, and joists without weakening the structure. It’s a balancing act:
- Drill holes cleanly through framing members where allowed (always check code restrictions on locations and maximum sizes).
- Use elbows, tees, and connectors to navigate turns—never cut large notches or bore oversize holes that could compromise strength.
- Drainage lines require that all pipes slope gently downward toward the exit point so gravity can do its job.
Don’t forget the vents! Vent pipes keep air moving through the plumbing system, preventing slow drains or—you guessed it—unwanted smells. Plan vertical chases or small wall cavities so these pipes can travel up and out through the roof.
Fixture Locations
Plumbing fixtures—think sinks, showers, and toilets—need to be “roughed in” at the exact spots shown on your blueprints, ideally before walls are fully enclosed. This means stubbing out pipes at the right height and distance, so installation is a breeze later.
In short: a successful plumbing install works with the framing, not against it, making sure every pipe, vent, and fixture gets its place in the puzzle—without creating headaches for inspection or future repairs.
Roof Ventilation and Insulation: Keeping Your Home Efficient and Dry
While it’s easy to focus on the visible bones of a house, what’s going on just beneath the roofline is just as critical for long-term durability and comfort. A well-ventilated and insulated roof is your best defense against energy loss, moisture buildup, and even costly structural damage.
Ventilation comes first—think of it as giving your house a way to “breathe.” Air needs to move freely through the attic or roof space to keep temperatures in check and moisture at bay. This is accomplished with a combination of ridge vents along the roof peak, soffit vents under the eaves, and sometimes gable vents at each end of the attic. When air enters through the soffits and exits through the ridge, it creates a steady airflow that flushes out hot, moist air. Without this, heat builds up under the roof in summer (making your AC work overtime) and condensation forms in winter, leading to mold or even rotting rafters.
Insulation, on the other hand, acts as a thermal barrier, slowing the movement of heat between your living space and the outdoors. Insulation—usually batts or blown-in materials—fits snugly between the rafters to keep your home warm in winter and cool in summer. The key here is balance: insulation should never block the airflow pathways created by your vents. Specialized baffles or rafter vents are often installed to keep the insulation in place while still letting air move freely above it.
In short, a roof that’s both ventilated and insulated properly will save you money on energy bills, keep your ceilings dry and mold-free, and extend the lifespan of your roof—making all your hard work on the framing even more worthwhile.
A look at different types of house framing
You might think that house framing is monolithic — just some wood put together to build a house. But there are different ways to frame a house. Here are some common house framing methods:
Balloon framing
This framing method was popular from the 1800s to the mid-1900s. Builders used balloon framing to build two-story houses. It was a cheap and efficient way to get homes built quickly.
In balloon framing, long pieces of wood are nailed to the foundation of the house to form the wall studs. These studs extend up to the second story of the house. Due to its simplicity, this was a quick method for house framing.
However, balloon framing fell out of fashion when the tall trees used to create these extra-long studs became harder to find.
Balloon framing also comes with a higher risk of fire. Because studs run all the way from the ground up to the house’s second story, fire can spread more quickly.
In some cases, you might need to use balloon framing for a specific area of your home. Always check with your contractor or another professional to see if this is the best house framing method for your needs.

Historical Context and Fire Risks
Balloon framing was a go-to method back in the day, mostly because it was fast and didn't require highly skilled labor. The long, continuous studs made it possible to put up two-story structures quickly, a huge advantage during periods of rapid expansion. Its popularity faded, however, as the old-growth forests that supplied the extra-long lumber began to disappear. This made the materials harder and more expensive to find, paving the way for modern framing techniques that use shorter, more common pieces of wood.
The biggest drawback to balloon framing, and the main reason it's no longer standard practice, is the significant fire hazard it creates. The wall cavities are open from the foundation all the way to the attic, essentially creating a chimney for flames. This allows a fire to spread incredibly fast between floors, often before anyone even realizes there's a problem. Modern building codes now require fire blocking—horizontal wood blocks placed inside the wall cavities—to slow the spread of fire, a critical safety feature missing from original balloon-framed homes.
Platform framing
After balloon framing became harder to accomplish, platform framing took over as the most common way to frame a house. And it’s still the most common type of framing today.
Like balloon framing, platform framing uses wood for building. However, the difference is that platform framing uses short pieces of lumber. Platform framing also allows each story of the house to be built individually.
Also, because platform framing uses shorter lumber pieces, fires won’t spread as quickly, and it tends to be more affordable because you end up using less wood to construct the frame.
Timber framing
One of the oldest house framing methods, timber framing, is still used for some builds today. This method is sometimes also called “post-and-beam construction” and has been around for centuries.
Timber framing was common prior to the industrial revolution and doesn’t rely on nails or screws to hold the frame together. Instead, a timber frame is made of interlocking posts and beams. This is accomplished through complex and detailed mortise and tenon joinery.
If you want to build a timber frame house, be prepared to spend top dollar. Timber framing is expensive because you need very specific pieces of wood to create the posts and beams, which may be harder to come by.
You’ll also need to hire a highly skilled carpenter to ensure your posts and beams fit together properly. Timber framing is one of the sturdiest house framing methods, but the high cost can put people off.
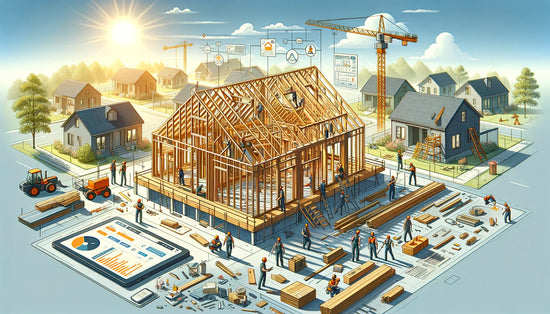
What Does It Cost To Frame A House In 2024?
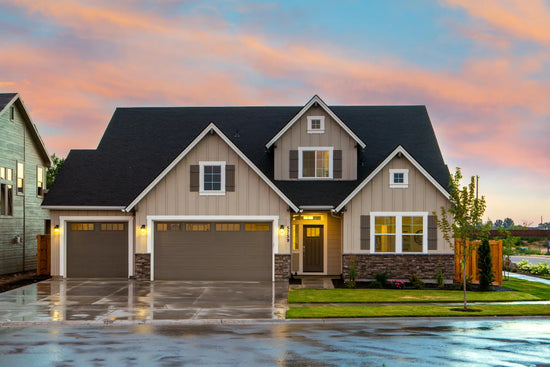
How Much Does It Cost To Build A House?
Modern and Alternative Framing Methods
While wood framing is the go-to for most residential projects, construction methods are always evolving. Today, builders have more options than ever, from materials that offer greater strength and efficiency to techniques that save time on the job site. These alternatives can help meet specific design goals or address regional challenges like high winds or seismic activity. Understanding these options can help you make a more informed decision for your own project, whether you're aiming for a unique aesthetic, superior energy efficiency, or a faster build time. Let's explore some of the most common modern and alternative framing methods.
Advanced and Pre-Fabricated Framing
To speed up construction and reduce on-site labor costs, many builders are turning to pre-fabricated framing. With this method, wall panels, floor systems, or even entire modules of a house are built in a factory under controlled conditions. These components are then transported to the building site and assembled. This approach minimizes weather delays and can lead to higher-quality construction. Modern framing techniques like this require precise planning to ensure every piece fits perfectly, but the efficiency gains are often well worth it.
Steel and Concrete Framing
Though more common in commercial construction, steel and concrete are also viable options for residential homes. Light-gauge steel studs can be used in place of wood studs, offering resistance to termites, rot, and fire. Concrete Masonry Units (CMUs), or concrete blocks, provide excellent durability and strength. While these materials often come with a higher upfront cost and may require specialized labor, their longevity and low maintenance can make them a smart long-term investment, especially in areas prone to harsh weather or pests.
Insulated Concrete Forms (ICFs)
Insulated Concrete Forms, or ICFs, are a unique hybrid building system. They consist of hollow foam blocks that are stacked to form the shape of the walls. The hollow cores are then reinforced with steel rebar and filled with concrete. The foam remains in place, providing a continuous layer of insulation on both the interior and exterior of the home. This method creates an incredibly strong, quiet, and energy-efficient structure that combines the benefits of concrete and foam insulation in one step.
Mass Wall Construction
Some building methods skip the frame altogether. In mass wall construction, the structure is supported by solid, thick walls made from materials like stacked logs, adobe, rammed earth, or solid brick. This approach is one of the oldest forms of building and is known for creating homes that are durable and naturally insulated due to the sheer thickness of the walls. While not as common today, it’s a beautiful and sustainable option for those seeking a rustic or natural aesthetic for their home.
Engineered Wood Products
Even traditional wood framing has seen major innovations. Engineered wood products, such as I-joists and laminated veneer lumber (LVL), are manufactured by binding wood strands, fibers, or veneers together with adhesives. These products are designed to be stronger and more dimensionally stable than solid lumber. Because they can span longer distances without support, they allow for the open-concept floor plans that are so popular in modern home design. They are a key component in making wood framing more versatile and efficient.
Framing Specifications and Building Codes
No matter which framing method you choose, your project must adhere to local building codes and construction standards. These rules aren't just suggestions; they are legal requirements designed to ensure the final structure is safe, stable, and durable for its occupants. From the size of the lumber to the spacing of the studs and the way walls are braced, every detail is specified for a reason. Following these guidelines is non-negotiable and is a critical part of any successful build. It protects your investment and, more importantly, ensures the safety of everyone who will live in the home.
Common Measurements and Lumber Quality
When you look at a house frame, you'll notice a consistent pattern. That's because building codes specify standard dimensions for framing members. For example, wall studs are typically 2x4s (1.5 by 3.5 inches) or 2x6s (1.5 by 5.5 inches) and are spaced 16 or 24 inches apart. The quality of the lumber is also regulated to ensure it has the necessary strength for load-bearing walls. Using the correct materials and measurements is the foundation of a structurally sound home.
Structural Requirements: Shear Walls and Bracing
A house frame needs to resist not only the downward force of gravity but also lateral (sideways) forces from wind and earthquakes. This is where shear walls and bracing come in. Building codes require walls to be reinforced, often by covering the frame with a layer of structural sheathing like plywood or oriented strand board (OSB). In some cases, diagonal metal straps or wood braces are also used. This reinforcement prevents the rectangular wall frames from racking and collapsing under pressure.
Important Construction Practices
Ultimately, the goal is to build a house that is strong, long-lasting, and fully compliant with all building regulations. The entire process starts long before the first nail is hammered. It begins with a solid plan. Before you can get a permit to build, you need a detailed site plan that shows the location of your proposed structure on your property. This plan is the blueprint your local building department uses to ensure your project meets zoning and code requirements. At My Site Plan, we provide permit-ready site plans that give you the foundation you need to start your project with confidence.
What should you do if it rains while framing a house?
Rainy weather is one of those uncontrollable variables that can appear right in the middle of framing—but it doesn’t have to spell disaster for your project. Here’s how to keep your framing work on track if the skies open up:
- Act quickly to protect exposed lumber: If you know rain is in the forecast, cover freshly framed areas with durable tarps or plastic sheeting to minimize direct water exposure. Treated lumber and engineered wood often have some built-in resistance, but prevention is always better than repair.
- Don’t rush to keep working on soaked frames: After a downpour, give the wood plenty of time to dry out naturally before closing up walls or installing insulation. Good airflow is key, so keep the structure as open and well-ventilated as possible.
- Check for signs of trouble: Once things have dried, inspect the framing for any signs of warping, swelling, or mold. If anything looks off, consult your contractor or building inspector about replacing damaged sections.
- Follow best practices for moisture management: Prolonged moisture exposure can lead to structural issues down the line, so taking these precautions now helps avoid far bigger headaches (and costs) later.
By staying vigilant and acting promptly during wet weather, you’ll keep your framing in great shape and set the stage for a safe, sturdy, and code-compliant home.
How much does it cost to frame a house?
How much it costs to frame a house depends on several factors, including the size of the home you’re building, how complex your design is, and what materials you’re using to frame your house. According to data from Angi, the average cost to frame a house is $23,000 and can range between $18,500 and $27,500. This works out to between $7 and $16 per square foot.
Want more detailed cost breakdowns for different types of house framing projects? We’ve got a full guide to tell you everything you need to know — check it out here: What Does It Cost To Frame A House In 2024?
Cost Factors: Single-Story vs. Two-Story
You might assume that framing a single-story home is always cheaper than a two-story one, but that’s not always the case on a per-square-foot basis. A two-story home requires a smaller, and therefore less expensive, foundation and roof for the same amount of interior living space. However, the framing for a second story is more complex and requires additional materials for the floor joists and staircase, which can increase labor costs. Ultimately, the biggest cost drivers are the overall size and the complexity of your design. A sprawling single-story home with an intricate layout can easily cost more to frame than a simple, box-shaped two-story house.
Tips for Building on a Tight Budget
Building a home on a budget is entirely possible with careful planning. The key is to make smart choices from the very beginning. Start by simplifying your house design; a simple rectangular footprint is significantly more affordable to frame than a complex shape with many corners and gables. You can also save a lot by choosing standard, readily available building materials over custom or premium options. Most importantly, have a solid plan before you break ground. Finalizing your site plan and blueprints early helps you get precise quotes from contractors and prevents expensive changes once construction has started.
How long does it take to frame a house?
Again, this will vary depending on how large your house is, among other factors. Plus, you’ll need to complete any necessary prep work before starting to frame your house. These preparations can include clearing trees and rocks from the lot, grading the land, and pouring your foundation. These steps can take a few weeks to complete before you even get to framing.
The house framing process itself will also take a few weeks to complete.
Is a Career in Framing Right for You?
The Role of a Framing Carpenter
A framing carpenter is responsible for building the structural "skeleton" of a house, including the walls, floors, and roof system. It's a job that demands precision and a sharp eye for detail. A key part of the role is the ability to read and interpret building plans to ensure every component is placed correctly. Having clear, easy-to-read site plans is crucial for this process to go smoothly. The work is physically demanding, requiring strength, stamina, and a willingness to work outdoors in all weather conditions. Framers use a variety of hand and power tools, from hammers and levels to circular saws, so being comfortable with this equipment is a must. Strong math skills are also essential for making calculations on the fly.
Career Path and Earning Potential
The most common route to becoming a framing carpenter is through a formal apprenticeship. These programs typically last three to four years and combine classroom instruction with paid, on-the-job training, which is a great way to earn while you learn. Most apprenticeships require a high school diploma or an equivalent to get started. In terms of earning potential, the average salary for a residential framing carpenter in the United States is around $41,600 per year, or about $20 per hour. Of course, this can vary based on your location, the complexity of the projects you work on, and your level of experience. With time and skill, there are opportunities to advance into supervisory roles or even start your own contracting business.
Time to build your dream home

Now that you know the basics of house framing, it’s time to start planning your build. If you need some help planning out building a new house, My Site Plan can help. At My Site Plan, we specialize in creating site plans to help you prepare for your home building and renovation projects. We can help you draft a site plan of your property or a provisional floor plan to help you prepare to frame your house.
Ready to start building the home of your dreams? Get in touch with My Site Plan to get started.
House framing FAQs
What are the pros and cons of using timber framing over platform framing for a new house?
Timber framing offers superior durability and aesthetic appeal due to its intricate wooden joinery, making it a good choice for those seeking a unique, sturdy structure. However, it is more expensive and can be limited by the availability of specialized lumber and skilled labor.
Platform framing, on the other hand, is more cost-effective, quicker to construct, and reduces fire risks due to its use of shorter lumber pieces, making it a practical choice for many homeowners.
How can I determine the best house framing method for my specific location and climate?
The choice of house framing method can depend on several factors including local climate conditions, availability of materials, and local building codes. Consulting with a local architect or builder who understands the environmental demands and regulatory requirements of your area can help you choose the most suitable framing method for your home.
What should I consider when selecting a builder for my house framing needs?
When selecting a builder for house framing, consider their experience with the specific type of framing you're interested in, their reputation in the industry, the quality of past projects, and their ability to communicate and work within your budget and timeline. Verifying their licensing and insurance is crucial to ensure they are qualified to handle your project.
Are there environmentally friendly options for house framing materials?
Yes, there are several environmentally friendly options for house framing, such as using sustainably sourced wood, recycled steel, or engineered wood products. These materials not only help reduce the environmental impact but can also provide durability and resistance against various elements depending on the material chosen.
What are some common challenges in house framing, and how can they be mitigated?
Common challenges in house framing include managing costs, ensuring structural integrity, and meeting local building codes. These can be mitigated by thorough planning, employing experienced builders, and conducting ongoing inspections during construction to ensure that everything is implemented according to the design and regulatory standards.
This post was originally published on 2021-04-06 by Ryan Crownholm. It was updated on 2024-07-03 to reflect the most recent information.
About the author

Ryan Crownholm
Ryan is a construction technology founder and former contractor with 15 years of hands on experience in residential and commercial construction. He has been creating site plans for more than 25 years, supporting tens of thousands of homeowners and contractors across the United States. As the founder of MySitePlan.com, his work is grounded in real world permitting requirements, plan review feedback, and practical compliance standards used by local building departments.
Key Takeaways
- Choose the right framing method for your project: While timber framing offers a classic look, platform framing is the go-to for most modern homes because it's cost-effective, uses standard lumber, and provides better fire safety.
- Keep your design simple to manage costs: The biggest factors affecting your framing budget are the home's overall size and architectural complexity. A straightforward, rectangular design is significantly more affordable to build than a custom layout with many corners and angles.
- Start with a solid, compliant plan: Before any construction begins, you need a detailed site plan that follows local building codes. This document is required for permits and is crucial for ensuring your project is safe, legal, and starts without costly delays.

